
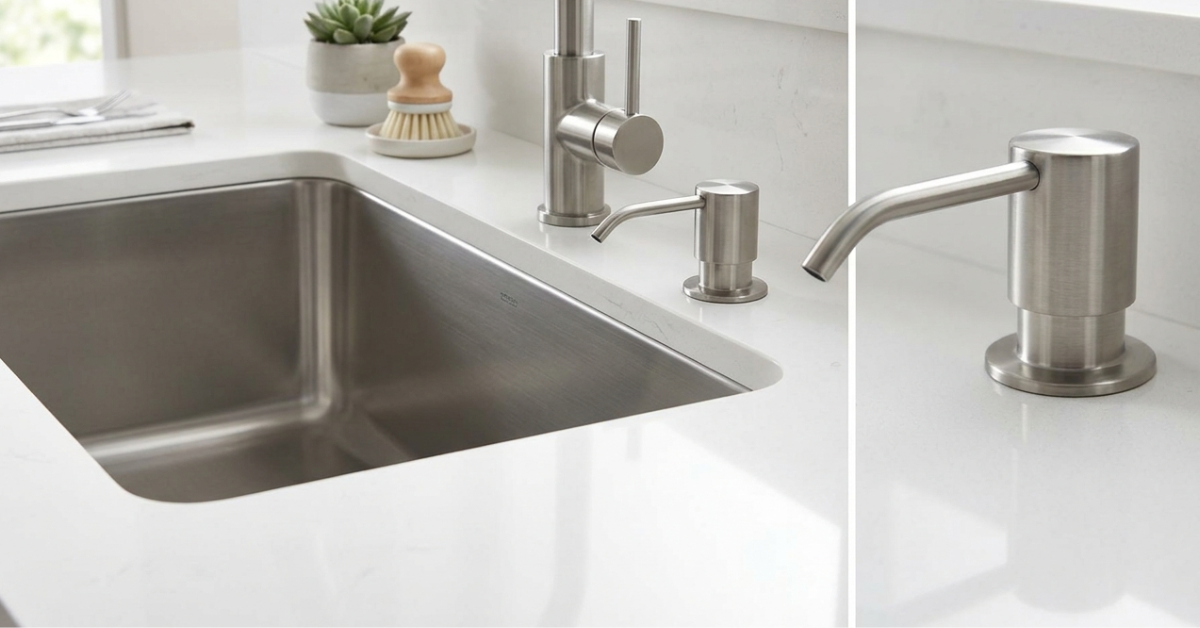
TL;DR: Installing an under-counter built in soap dispenser eliminates messy plastic bottles, recovers critical counter real estate, and creates an effortlessly hygienic wash station.
By mounting the pump head directly into your sink deck or countertop, you streamline dishwashing workflows while protecting cabinetry from moisture degradation.
Technical Breakdown: built in soap dispenser Architecture
Understanding the mechanics of an integrated counter soap dispenser design ensures a smooth installation and long-term reliability.
Unlike temporary surface pumps, standard built in soap dispenser use a solid brass or 304 stainless steel pump assembly linked to a high-capacity reservoir mounted beneath the counter.
┌─────────────────────────────────────────┐
│ Ergonomic Pump Head │ <– Above Counter Surface
└────────────────────┬────────────────────┘
│ Threaded Shank & Flange
─────────────────────┴───────────────────── <– Countertop / Sink Deck
│ Rubber & Friction Washers
│ Mounting Nut
┌────────────────────┴────────────────────┐
│ Top-Fill Feed Channel │
├─────────────────────────────────────────┤
│ 17 oz to 32 oz Liquid Reservoir │ <– Below Counter Space
└─────────────────────────────────────────┘
A standard installation uses an industry-standard $1\frac{3}{8}\text{ inch}$ ($35\text{ mm}$) mounting hole drilled into the countertop or pre-punched in stainless steel sinks.
- Pump Assembly: Features a spring-loaded internal piston with check valves that maintain prime, delivering a consistent $1.5\text{ to }2.0\text{ mL}$ soap dosage per stroke.
- Mounting Flange & Shank: A threaded hollow shank passes through the counter, secured from beneath using rubber sealing washers and a threaded lock nut.
- Reservoir / Direct Tube System: Connects to a 17 oz (500 mL) bottle or extends via a silicone tube to a large bulk container.
Why Modern Kitchens Require Integrated Soap Systems
Messy countertops around the sink remain a primary source of frustration in modern homes.
Traditional plastic detergent bottles collect grime, pool soapy water along counter edges, and degrade high-end stone or laminate finishes over time.
Integrating built in soap dispenser kitchen sink accessories changes daily maintenance in three distinct ways:
1. Reclaiming Counter Real Estate
Compact apartment kitchens suffer when surface space is taken up by cleaning supplies.
Moving the liquid container beneath the sink opens up the perimeter around your basin.
This prevents water pooling against wall backsplashes and keeps food preparation zones sanitary.
2. Streamlining Cleaning Workflows
A fixed, top-fill dispenser allows single-handed soap dispensing directly onto sponges or cookware.
You no longer need to lift wet, slippery soap bottles with soapy hands, keeping your sink deck dry.
3. Protecting Cabinet Integrity
Frequent handling of wet bottles causes drips that run down cabinet doors and sink aprons.
Over time, standing moisture causes wooden or composite panels to swell and warp. Direct sink-line dispensing prevents water runoff from reaching delicate cabinet joinery.
Key Hardware Configurations & Top-Fill Innovations
Selecting the right built in soap dispenser requires matching your household workflow with the correct mechanics.
Standard Reservoir vs. Direct Extension Kits
| Feature | Integrated Bottle Reservoir | Extended Silicone Tube System |
| Capacity | $17\text{ oz} – 32\text{ oz}$ ($500 – 1000\text{ mL}$) | $1\text{ Gallon}$ (External bottle) |
| Refill Frequency | Every 3 to 6 weeks | Every 6 to 12 months |
| Under-Sink Footprint | Hangs directly below pump | Requires floor space for bulk bottle |
| Installation Complexity | Low (Screw-on bottle) | Moderate (Requires check-valve tube routing) |
| Best For | Standard residential use | High-volume home kitchens |
Top-Fill Mechanism
Older dispenser models required crawling under the sink cabinet to unscrew the fluid bottle from below. Contemporary units use a top-refill structure:
Pro Tip: Simply lift the pump head straight up out of the neck flange above the counter, pour liquid soap directly into the opening, and drop the pump back into place. Never unscrew the under-sink bottle for routine refills.
Strategic Integration with Modern Kitchen Cabinetry
A built-in dispenser works best when planned alongside your under-sink cabinetry layout.
High-moisture areas around plumbing lines demand durable materials and smart interior spatial design.
Moisture-Proof Material Selection
Near sink plumbing, choose cabinet materials designed to resist moisture and humidity:
- PVC Board Cabinets: Completely impervious to water leaks, rot, and pests. Ideal for under-sink bases.
- HMR (High Moisture Resistance) Board: Engineered core boards sealed with high-pressure laminates offer structural stability without swelling.
- 304 Stainless Steel Interiors: High-end modular installations use stainless steel liner trays inside sink cabinets to catch accidental plumbing drips.
Optimizing Under-Sink Storage Space
Integrating a dispenser bottle or direct feed tube requires clean vertical clearance beneath the sink deck.
- Route plumbing trap lines toward the rear wall to keep the space beneath the dispenser hole clear.
- Pair your wash station with specialized 2-shelf pull-out organizers to keep extra sponges, scrubbers, and cleaning agents neatly stored out of sight.
- Ensure direct-feed silicone tubes run clear of drawer slides and garbage disposals to avoid pinching the soap line.
Essential Cabinet Hardware & Accessory Combinations
Achieving a clean look requires coordinating your soap pump with surrounding hardware and space-saving kitchen solutions.
Soft-Close Systems & Drawer Runners
Under-sink pull-out units rely on high-grade hardware to maintain smooth operation:
- Concealed Under-Mount Runners: Keep metal tracks hidden from humidity while supporting heavy cleaning supply baskets.
- Soft-Close Dampeners: Prevent cabinet doors and pull-outs from slamming, extending structural joint integrity.
Organizing Around the Sink Zone
Complement your dispenser with integrated storage hardware:
- Over-Sink Drip Racks: Mount above or inside the basin to dry sponges without leaving water marks on countertops.
- Internal Drawer Dividers: Organize micro-fiber cloths, scraper tools, and spare pump components inside adjacent top drawers.
- Pull-Out Trash Bins: Mounted on under-sink tracks to store waste bins alongside your soap reservoir.
Step-by-Step Installation & Maintenance Guide
Installing a built in soap dispenser is a straightforward DIY project or quick plumber add-on during counter fabrication.
Step 1: Prep & Drill ──► Step 2: Seal & Mount ──► Step 3: Secure Locknut ──► Step 4: Connect & Prime
(35mm Hole) (Flange + O-Ring) (Hand-tighten below) (Fill & pump until primed)
Required Tools & Materials
- Built-in soap dispenser kit
- Adjustable wrench or basin wrench
- Silicone sealant (for unsealed natural stone)
- Measuring tape
Installation Steps
- Verify Clearance: Measure beneath the counter to ensure the $3\text{ to }4\text{ inch}$ radius around the mounting hole is free of cabinet framing and sink rims.
- Position Seals: Place the rubber O-ring or silicone gasket onto the base of the upper dispenser flange.
- Insert Assembly: Drop the threaded shank down through the $35\text{ mm}$ counter hole from above.
- Anchor Below Counter:Thread washers and nut onto shank below counter. Hand-tighten, plus a 1/4 wrench turn. Don’t crack sink.
- Attach Fluid Container: Thread the reservoir bottle onto the lower shank, or attach the extension tube kit with an inline check valve.
- Prime the Pump: Fill the reservoir from above using standard liquid soap diluted with 10% water if overly viscous. Insert the pump head and press 10 to 15 times to prime the suction valve.
Common Installation Mistakes & How to Avoid Them
Even simple accessory installs can run into issues if key details are overlooked.
1. Mounting Too Far from the Sink Edge
- The Error: Drilling the mounting hole too far back from the inner sink wall causes soap to drip onto the counter rim instead of into the basin.
- The Fix: Position the hole center within $1.5\text{ to }2\text{ inches}$ from the inner basin lip, ensuring the spout nozzle extends comfortably over the sink edge.
2. Using Highly Viscous Soaps Without Dilution
- The Error: Ultra-thick concentrated dish soaps create high vacuum resistance inside small internal pump valves, causing the pump head to stick down.
- The Fix: Mix thick dish soaps with a small amount of warm water before filling, or select high-flow check valves designed for viscous liquids.
3. Neglecting Sealing Gaskets
- The Error: Skipping the top rubber washer allows surface water pooling around the faucet base to trickle down the shank into the under-sink cabinet.
- The Fix: Always verify the rubber O-ring sits flush against the counter. Apply a thin bead of clear neutral-cure silicone beneath the flange on rough natural stone surfaces.
Material & Finish Matching Matrix
To maintain a cohesive look, match your counter soap dispenser design with your primary sink faucet and cabinet hardware.
| Finish Style | Faucet & Sink Pairing | Cabinet Hardware Match | Maintenance Level |
| Brushed 304 Stainless | Satin Stainless Steel / Granite Composite | Brushed Chrome / Aluminum Profiles | Low (Hides water spots) |
| Matte Black | Matte Black Faucet / Dark Composite Sink | Anodized Black Edge Pulls | Medium (Wipe periodically) |
| Polished Chrome | Mirror Finish Stainless Steel | Polished Chrome Handles | High (Show fingerprints) |
| Brushed Brass / Gold | Vintage or Luxury Brass Mix | Warm Brass Knobs / Knurled Handles | Medium (PVD coatings resist tarnish) |
2026 Trends in Kitchen Sink Accessories
Kitchen design continues to focus on hands-free operation, seamless integration, and streamlined finishes.
Touchless Sensor Dispensers
Motion-activated, sensor-driven pumps mounted directly into countertops are replacing manual push pumps.
These battery-powered or AC-adapter units deliver pre-measured soap amounts without physical contact, improving hygiene during raw food preparation.
Integrated Dual-Pump Systems
Modern multi-hole sink decks now accommodate dual built-in pumps side-by-side: one dedicated to heavy-duty dish detergent .
And the other to antibacterial hand soap, both fed from hidden under-sink reservoirs.
Matte & PVD Protective Coatings
Physical Vapor Deposition (PVD) finishes give brass and stainless steel hardware high scratch resistance and defense against harsh household cleaning chemicals.
Next Steps & Resource Directories
Selecting and installing a high-quality built in soap dispenser eliminates everyday counter clutter and keeps your wash station organized and dry.
Paired with durable cabinetry and modern interior hardware, an integrated dispenser delivers lasting function and clean style for your kitchen.
Final Footer Block
Next Steps & Resource Directories
Browse Full Directories
[KitchenLink Hub] > [Storage Accessories]
Related Articles
- Top Pull Out Drawers for Wardrobes to Maximize Storage
- Pantry Pull Out Unit for Smart Kitchen Storage Solutions!!
- Pull Out Trouser Rack: Smart Wardrobe Storage Solutions
- Tall Pull Out Cabinet: Smart Kitchen Storage Solution
