
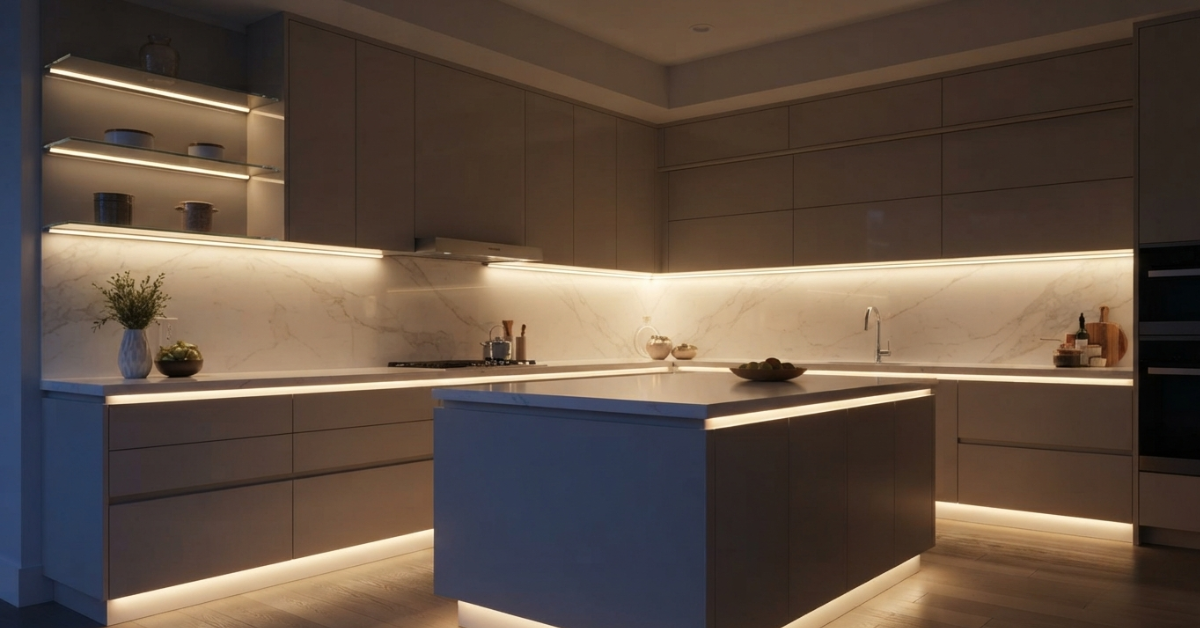
TL;DR: Modern kitchen strip lights eliminate counter shadows, boost task visibility, and elevate ambient aesthetics in single-zone or open-concept homes. By pairing high-CRI LED strips with frosted aluminum channels, you create seamless task lighting over prep zones while adding luxurious depth along toe kicks and floating shelves.
Technical Fundamentals: Anatomy of high-performance kitchen LED strips
Selecting the correct LED strip profile dictates both light output quality and long-term hardware reliability across humid cooking environments.
COB versus SMD strip architectures
COB strip lights eliminate diode dotting for smooth, continuous countertop illumination, while SMD strips work best for hidden indirect accent lighting.
Voltage options: 12V versus 24V DC systems
Low-voltage DC LED installations require dedicated power transformers (drivers) to step down AC mains power.
- 12V DC Strips: Suitable for short runs under 16 feet (5 meters). They exhibit noticeable voltage drop and dimming over longer distances.
- 24V DC Strips: Ideal for larger : kitchen strip lights layouts requiring continuous runs up to 32 feet (10 meters) on a single power feed with uniform brightness from start to finish.
IP protection ratings for cooking zones
Kitchen environments present varying levels of moisture, airborne grease, and steam depending on proximity to water sources or cooktops.
+——————+——————+————————————+
| Kitchen Zone | Recommended IP | Environmental Protection |
+——————+——————+————————————+
| Under Cabinets | IP65 | Dust-tight & splash resistant |
| Island Toe Kicks | IP65 / IP67 | Splash resistant & mop-water safe |
| Prep Sink Area | IP67 | Water immersion & steam resistant |
| Ceiling Soffits | IP20 | Standard dry location protection |
+——————+——————+————————————+
Critical placement zones for functional and ambient kitchen lighting
A layered lighting strategy divides your space into functional work areas and atmospheric ambient zones.
Zone 1: Under-cabinet task illumination
Front-mounted under-cabinet LEDs cast shadow-free light across prep zones without eye glare, creating an ergonomic, efficient: kitchen strip lights workspace.
Zone 2: Island underside and toe-kick accents
Toe-kick strip lighting floats lower cabinetry visually while providing subtle night-light guidance without blinding room occupants.
- Mount IP65-rated strips inside downward-facing 45-degree aluminum channels beneath the bottom cabinet edge.
- Wire toe-kick lighting to dedicated motion sensors or low-voltage smart dimmers for automatic night illumination.
- Ensure power supply units remain accessible inside nearby lower base cabinets or sink access panels.
Zone 3: In-cabinet and glass display accent lighting
Internal cabinet illumination turns storage areas into visual showcases while making cookware and glassware immediately visible.
Mount vertical channels along the inner front face of cabinets rather than the back wall to illuminate shelf contents evenly.
When pairing illuminated display cabinets with specialized storage fixtures like a magic corner, the interior lighting makes accessing deep corner items effortless.
Color temperature and CRI selection guide
Color temperature (measured in Kelvin) and Color Rendering Index (CRI) dictate how natural food ingredients, cabinetry finishes, and stone surfaces look under artificial light.
Kelvin temperature mapping for : kitchen strip lights finishes
Matching light color temperature to counter materials and paint finishes preserves room harmony:
- 2700K – 3000K (Warm White): Best for traditional : kitchen strip lights with rich wood tones, warm butcher block counters, bronze hardware, and creamy off-white cabinetry.
- 3500K – 4000K (Neutral Daylight White): Best for modern: kitchen strip lights featuring white quartz, stainless steel appliances, gray slate backsplash tiles, and cool minimalist color schemes.
- 5000K+ (Cool White): Generally avoided in residential : kitchen strip lights as it casts a harsh, clinical blue hue that makes fresh food look unappetizing.
Why Color Rendering Index (CRI 90+) is mandatory
CRI measures how accurately a light source reveals true object colors compared to natural daylight (100 CRI).
Always select LED strips with a CRI rating of 90 or higher (R9 value above 50). High CRI ensures fresh produce appears vibrant, meats retain natural hues during prep, and subtle stone veining stands out clearly.
Power, dimming, and smart control infrastructure
Reliable LED strip installations depend on correctly sized power drivers and compatible control systems.
Calculating driver power wattage requirements
Calculate driver load requirements by multiplying total strip length by power consumption per foot, then adding a 20% safety margin buffer:
- Calculate base wattage: 12 feet of strip light × 4.5 Watts per foot = 54 Watts total base load.
- Apply safety buffer: 54 Watts × 1.20 buffer = 64.8 Watts required driver capacity.
- Select driver: Choose the next standard driver size, which is a 75W 24V DC dimmable power supply.
Dimming protocols: TRIAC, 0-10V, and PWM drivers
Matching your wall switch control type to driver electronics avoids common flickering issues:
- TRIAC Dimmable Drivers: Compatible with standard forward-phase or reverse-phase AC wall dimmers.
- 0-10V Drivers: Ideal for home automation systems requiring smooth low-end dimming down to 1%.
- Pulse Width Modulation (PWM): Used in low-voltage receivers between driver and strip for flicker-free CCT or RGBW dynamic tuning.
Step-by-step LED strip installation workflow
Following proper installation methods guarantees clean visual results and protects low-voltage components against premature heat degradation.
1.Measure and plan power feed entry points:Step 1: Layout & prep.
Measure all cabinet run lengths precisely. Mark driver housing locations inside upper cabinets near existing outlet boxes, ensuring low-voltage wires exit neatly near channel start points.
2.Cut and mount aluminum diffuser channels:Step 2: Track installation.
Cut aluminum channels to length using a fine-tooth metal saw. Secure channels flush against cabinet undersides using flathead screws or heavy-duty mounting clips.
3.Prepare surface and adhere LED strips:Step 3: Strip adhesion.
Clean inner channel surfaces thoroughly with isopropyl alcohol to remove dust and oils. Peel the 3M adhesive backing and press the LED strip firmly into the channel in 6-inch increments.
4.Solder or clip electrical connections:Step 4: Wiring.
Connect low-voltage lead wires to strip contact pads using direct solder joints or solid pin connectors. Snap frosted plastic diffuser covers into place over aluminum tracks.
5.Connect driver and test illumination zones:Step 5: Commissioning.
Wire driver primary AC inputs to wall switch lines and low-voltage secondary outputs to LED strip leads. Power on the system to verify uniform dimming and heat dissipation.
Common kitchen strip lighting mistakes and solutions
Avoiding frequent design oversights keeps your installation functional, durable, and visually pleasing.
Issue 1: Visible LED dot reflection on glossy counters
- Cause: Exposed SMD LEDs mounted too close to reflective surfaces without proper diffusion.
- Fix: Upgrade to high-density COB LED strips or install deep aluminum channels (minimum 15mm depth) equipped with curved opal diffusers.
Issue 2: Uneven brightness across long cabinet runs
- Cause: Excessive voltage drop along low-voltage wire paths.
- Fix: Switch from 12V to 24V DC systems, or run parallel power feeds (ring main layout) from the driver to both ends of long strip runs.
Issue 3: Strip light peeling off cabinet undersides
- Cause: Mounting tape applied directly to unsealed wood or dusty cabinet surfaces without prep.
- Fix: Always install strips inside rigid aluminum tracks using mechanical mounting screws rather than relying solely on self-adhesive backing.
When modernizing your kitchen strip lights prep areas with proper lighting, integrating wall-mounted organization like a dedicated multi-function rack keeps counters clear while catching direct under-cabinet task illumination.
Similarly, pairing task lighting over cooking stations near your high-efficiency gas stove improves cooking visibility and kitchen safety.
Future trends in kitchen strip lighting (2026 and beyond)
Modern kitchen design incorporates dynamic lighting technologies that adapt to natural circadian rhythms and home automation networks.
- Tunable White (CCT) Automation: Dynamic LED strips automatically adjust color temperature from 4000K crisp white during morning prep to 2400K ultra-warm amber during evening dinner gatherings.
- Ultra-Slim Micro COB Profiles: Next-generation strips under 4mm width allow seamless recessed mounting flush within cabinet shelf edges without visible track outlines.
- Matter and Thread Ecosystem Integration: Smart LED controllers natively bridge into unified smart home platforms without requiring proprietary third-party hub hardware.
Pro Tip: When installing under-cabinet lighting, always run extra 4-conductor low-voltage cables during rough-in phases. This future-proofs your installation for seamless upgrades from single-color to tunable-white or RGBW accent lighting later.
Properly executed kitchen strip lights elevate everyday task functionality while creating a welcoming environment for cooking and entertaining.
Next Steps & Resource Directories
Browse Full Directories
[Kitchen Link Home] > [Kitchen Accessories & Lighting Solutions]
Related Articles
- Kitchen Sink Price in Bangladesh Guide
- Magic Corner Fittings for Modern Storage
- Multi-Function Storage Rack Options
- Gas Stove Models and Price Guide
